Create PDF documents using React.js
- Last updated on
- 19 Aug 2022
- tags
-
#PDF
-
#React
-
#Flexbox
Two months ago, a customer asked me for a proforma invoice. She wanted her company's accountant to approve our charges before she paid, that way she would avoid issues when claiming the money back from the company. Yet to find a template that I liked half an hour later, I decided to make my own using LibreOffice. It took me three good hours to prepare the invoice.
It was not until two weeks later, when another customer requested a similar document, that I considered automating this task.
- I would be less worried of errors - Some data like invoice number and dates would be generated automatically
- Documents would conform to the brand with minimum effort
- It would save me lots of time.
Choices
This problem looked like one that I could solve with JavaScript even though it wasn't clear how.
The first library that I came across on was PDFlib. I was quick to rule it out because of it Canvas-like API, as I feared it would take me lots of time to achieve the structure I had in mind. I needed a more familiar approach, one in which I could write the document using HTML elements. I later landed on react-pdf and I was impressed by the examples.
What we'll build
In this article, I will show you how to make a react component that generates this PDF proforma invoice.
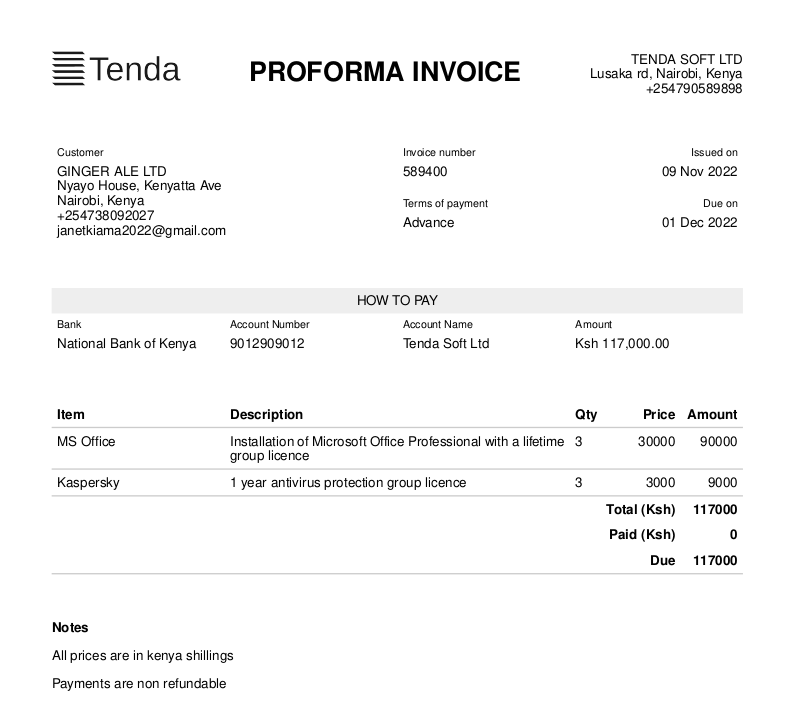
I'll omit the business logic that precedes invoices like order management and instead focus on getting the invoice to look exactly like this.
Install a fresh react project
Now that its clear what we want, lets begin.
Install a fresh react typescript from the terminal/cmd
yarn create react-app invoice --template typescript
Navigate to the creates invoice folder
cd invoice
Then, install the react-pdf/renderer module using yarn
yarn add @react-pdf/renderer
Pitfall
As of November 2022, installing the@react-pdf/renderer using npm causes peer dependency mismatch errors with react version 18.
Then, open the invoice folder in your favourite code editor.
Lets start with the header. Create a file named app.tsx file in the src folder. Add the App and Invoice to it.
import {
  Document,
  Page,
  PDFViewer,
} from "@react-pdf/renderer";

export default function App() {
  return (
      <PDFViewer width="100%" height="900">
        <Invoice />
      </PDFViewer>
  );
}

function Invoice() {
  return (
    <Document>
      <Page
        size="A4"
        style={{ fontFamily: "Helvetica", fontSize: 10 , margin: 40 }}
      ></Page>
    </Document>
  );
}
Now create the index.tsx file. This file acts as the React entry file.
import React from "react";
import ReactDOM from "react-dom/client";
import App from "./app";

const root = ReactDOM.createRoot(document.getElementById("root") as Element);
root.render(
  <React.StrictMode>
    <App />
  </React.StrictMode>
);
Run the development server, from the terminal
yarn start
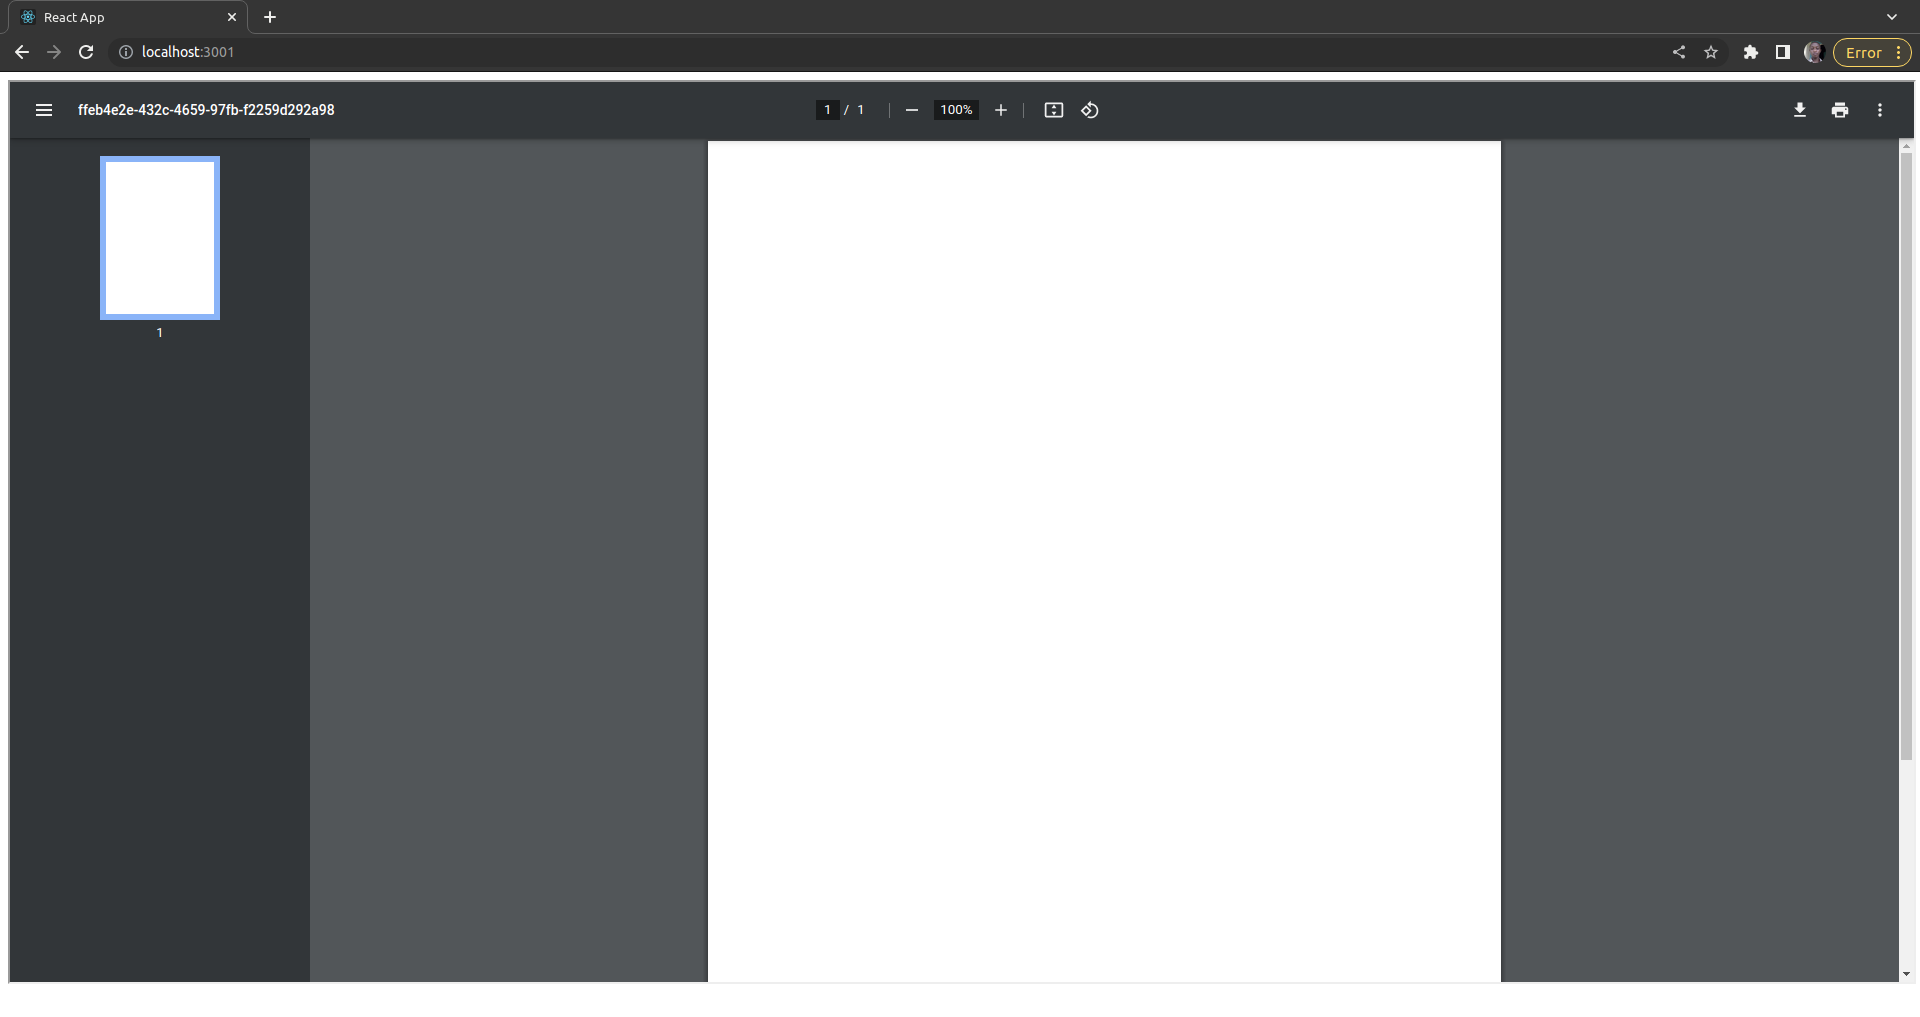
This will start the server and open the url in your default browser. If everything went well, you will see this in the browser.
Pitfall
The `PDFViewer`, the component responsible for the pdf widget, may not work as expected in Firefox. If having problems, use a chromium-based browser like chrome or edge.Here specified that out pages should be of the legal letter size by supplying the size prop to Page.
Overview of @react-pdf/renderer
The @react-pdf/renderer library makes is easy to create PDF using the familiar React.js API. Although it does not support the entire HTML and CSS spec, it comes with everything you would ever need to create professional document.
We'll use these components to make the invoice.
Text: A block level text container. Text not wrapped within this element will not appear on the document.View: A general block level element that is equivalent to a HTMLdivImage: Equivalent to HTMLimgPage: Equivalent to HTMLbodyDocument: Denotes a PDF document. equivalent to HTMLhtmlelement.PDFViewer: Utility to preview PDF documents in the browser.
Styling
React-pdf supports almost all CSS properties that are used to style text. It also comes bundled with three fonts: courier (monospace), and Times-Roman (serif), and Helvetica (sans-serif).
Most importantly, it supports position, margin, padding, and flex properties giving you power to create amazing documents with minimum effort.
Adding the header
Download this image and copy it into the public folder located in the root of the react project.

Add a header component and render it in invoice, like this.
import {
  Document,
  Image,
  Page,
  PDFViewer,
  Text,
  View,
} from "@react-pdf/renderer";

export default function App() {
  return (
      <PDFViewer width="100%" height="900">
        <Invoice />
      </PDFViewer>
  );
}

function Header() {
  return (
    <View
      style={{
        display: "flex",
        flexDirection: "row",
        alignItems: "center",
        justifyContent: "space-between",
      }}
    >
      <View>
        <Image
          src={logo}
          style={{
            width: "96pt",
          }}
          cache
        ></Image>
      </View>

      <Text
        style={{
          padding: "4pt",
          fontSize: "20pt",
          fontFamily: "Helvetica-Bold",
        }}
      >
        PROFORMA INVOICE
      </Text>
      <View>
        <Text style={{ marginLeft: "auto", textTransform: "uppercase" }}>
          Tenda Soft Ltd
        </Text>
        <Text style={{ marginLeft: "auto"}}>
          Lusaka rd, Nairobi, Kenya
        </Text>
        <Text style={{ marginLeft: "auto"}}>
          +254790589898
        </Text>
      </View>
    </View>
  );
}

function Invoice() {
  return (
    <Document>
      <Page
        size="A4"
        style={{
          fontFamily: "Helvetica",
          fontSize: "10pt",
          backgroundColor: "white",
          padding: "40pt",
        }}
      >
        <Header />
      </Page>
    </Document>
  );
}
Pitfall
As opposed what happens in CSS, theflex-direction property defaults to column in react-pdf/renderer.
You'll also notice that I am changing the font-family to render bold text. This is because the fonts weights are provided as individual fonts , this means set font-width styles have no effect.
Before we continue, let's clean the inline css by using the Stylesheet helper to create reusable styles.
import {
  Document,
  Image,
  Page,
  PDFViewer,
  StyleSheet,
  Text,
  View,
} from "@react-pdf/renderer";

export default function App() {
  return (
    <PDFViewer width="100%" height="900">
      <Invoice />
    </PDFViewer>
  );
}

var styles = StyleSheet.create({
  page: {
    fontFamily: "Helvetica",
    fontSize: 10,
    padding: 40,
  },
  title: {
    padding: "4pt",
    fontSize: "20pt",
    fontFamily: "Helvetica-Bold",
    textTransform: "uppercase",
  },
  textRight: {
    marginLeft: "auto",
  },
  rowBetween: {
    display: "flex",
    flexDirection: "row",
    justifyContent: "space-between",
  },
});

function Invoice() {
  return (
    <Document>
      <Page size="A4" style={styles.page}>
        <Header />
      </Page>
    </Document>
  );
}

function Header() {
  return (
    <View style={styles.rowBetween}>
      <View>
        <Image
          src="/logo.png"
          style={{
            width: "96pt",
          }}
          cache
        ></Image>
      </View>

      <Text style={styles.title}>PROFORMA INVOICE</Text>
      <View>
        <Text style={{ ...styles.textRight, textTransform: "uppercase" }}>
          Tenda Soft Ltd
        </Text>
        <Text style={styles.textRight}>Lusaka rd, Nairobi, Kenya</Text>
        <Text style={styles.textRight}>+254790589898</Text>
      </View>
    </View>
  );
}
StyleSheet.create() returns a regular JavaScript that can be extended using the spread syntax, like we have done here.
<Text style={{ ...styles.textRight, textTransform: "uppercase" }}>
  Tenda Soft Ltd
</Text>
Sink
I don't plan my styles ahead, that is why I keep them inline as long they are short and not repetitive.I'm reluctant to create a new file for every new component I think of. I have a habit of writing components in a single file until they start to look misplaced and at the moment the Invoice, looks just that.
Looking at the header component, it seems like something I want to appear on every pdf document, except for the 'INVOICE' title. We can refactor it to a generic component that accepts a title prop.
Next, the way we are using PDFViewer in app doesn't look right. We are making App aware of how PDF are rendered, a detail should be none of its business. To resolve this, we create a new file and call it pdf-document.tsx to hold the pdf viewing logic and template.
import {
  Document,
  Image,
  Page,
  PDFViewer,
  StyleSheet,
  Text,
  View,
} from "@react-pdf/renderer";
import React from "react";

const styles = StyleSheet.create({
  page: {
    fontFamily: "Helvetica",
    fontSize: 10,
    padding: 40,
  },
  title: {
    padding: "4pt",
    fontSize: "20pt",
    fontFamily: "Helvetica-Bold",
  },
  textRight: {
    marginLeft: "auto",
  },
  rowBetween: {
    display: "flex",
    flexDirection: "row",
    justifyContent: "space-between",
  },
});

export default function PDFDocument({
  children,
  title,
}: {
  children: React.ReactNode,
  title?: string,
}) {
  return (
    <PDFViewer width="100%" height="900">
      <Document>
        <Page size="A4" style={styles.page}>
          <Header title={title} />
          {children}
        </Page>
      </Document>
    </PDFViewer>
  );
}

function Header({ title }: { title?: string }) {
  title = title || "Proforma Invoice";
  return (
    <View style={styles.rowBetween}>
      <View>
        <Image
          src="/logo.png"
          style={{
            width: "96pt",
          }}
          cache
        ></Image>
      </View>

      <Text style={styles.title}>{title}</Text>
      <View>
        <Text style={{ ...styles.textRight, textTransform: "uppercase" }}>
          Tenda Soft Ltd
        </Text>
        <Text style={styles.textRight}>Lusaka rd, Nairobi, Kenya</Text>
        <Text style={styles.textRight}>+254790589898</Text>
      </View>
    </View>
  );
}
Now create a invoice.tsx and use the PDFDocument as a template in the Invoice template.
import { Text, View } from "@react-pdf/renderer";
import React from "react";
import PDFDocument from "./pdf-document";

export default function Invoice() {
  return (
    <PDFDocument>
      <View>
        <Text>Body of the invoice</Text>
      </View>
    </PDFDocument>
  );
}
Change the app.tsx to reflect the changes.
import React from "react";
import Invoice from "./invoice";

export default function App() {
  return <Invoice />;
}
Now that everything is cleaner, let's build to the top section that shows the invoice details.
Add the details component into the invoice.tsx
export default function Invoice() {
  return (
    <PDFDocument>
      <Details />
    </PDFDocument>
  );
}

const styles = StyleSheet.create({
  section: {
    marginTop: "4vh",
  },
  row: {
    display: "flex",
    flexDirection: "row",
  },
  equalSize: {
    flex: "1 1 0%",
  },
  halfWidth: {
    width: "50%",
  },
  quarterWidth: {
    width: "25%",
  },
  tableCell: {
    padding: "4",
  },
  pushRight: {
    marginLeft: "auto",
  },
  dt: {
    fontSize: "8pt",
    marginBottom: "4pt",
  },
});

function Details() {
  return (
    <View style={Object.assign({}, styles.section, styles.row)}>
      <View style={Object.assign({}, styles.tableCell, styles.halfWidth)}>
        <Text style={styles.dt}>Customer</Text>
        <Text style={{ textTransform: "uppercase" }}>Janet Kiama</Text>
        <Text>Nyayo House, Kenyatta Ave</Text>
        <Text>Nairobi, Kenya</Text>
        <Text>+254738092027</Text>
        <Text>janetkiama2022@gmail.com</Text>
      </View>
      <View style={styles.equalSize}>
        <View style={Object.assign({}, styles.tableCell, styles.equalSize)}>
          <Text style={styles.dt}>Invoice number</Text>
          <Text>589400</Text>
        </View>
        <View style={Object.assign({}, styles.tableCell, styles.equalSize)}>
          <Text style={styles.dt}>Terms of payment</Text>
          <Text>Advance</Text>
        </View>
      </View>
      <View style={styles.equalSize}>
        <View style={Object.assign({}, styles.tableCell, styles.equalSize)}>
          <Text style={Object.assign({}, styles.dt, styles.pushRight)}>
            Issued on
          </Text>
          <Text style={styles.pushRight}>09 Nov 2022</Text>
        </View>
        <View style={Object.assign({}, styles.tableCell, styles.equalSize)}>
          <Text style={Object.assign({}, styles.dt, styles.pushRight)}>
            Due on
          </Text>
          <Text style={styles.pushRight}>01 Dec 2022</Text>
        </View>
      </View>
    </View>
  );
}
Here, we create a table/grid like structure using the CSS flex box.
Sink
To make the width of the children of a flex element equal we set the flex property on each child `flex: 1 1 0%`. To deeply understand theflex property consider reading Robin Rendle's article Understanding flex-grow, flex-shrink, and flex-basis
We use Object.assign() to combine styles, mimicking what we would do if we were using a CSS utility library.
To conclude, we'll add the remaining sections using the techniques we learnt.
export function BankDetails() {
  return (
    <View style={styles.section}>
      <View style={Object.assign({}, styles.row, styles.sectionHeading)}>
        <Text>HOW TO PAY</Text>
      </View>
      <View style={styles.row}>
        <View style={Object.assign({}, styles.tableCell, styles.equalSize)}>
          <Text style={styles.dt}>Bank</Text>
          <Text>National Bank of Kenya</Text>
        </View>
        <View style={Object.assign({}, styles.tableCell, styles.equalSize)}>
          <Text style={styles.dt}>Account Number</Text>
          <Text>9012909012</Text>
        </View>
        <View style={Object.assign({}, styles.tableCell, styles.equalSize)}>
          <Text style={styles.dt}>Account Name</Text>
          <Text>Tenda Soft Ltd</Text>
        </View>
        <View style={Object.assign({}, styles.tableCell, styles.equalSize)}>
          <Text style={styles.dt}>Amount</Text>
          <Text>Ksh 117,000.00</Text>
        </View>
      </View>
    </View>
  );
}

function Summary() {
  let lineItems = [
    {
      item: "MS Office",
      description:
        "Installation of Microsoft Office Professional with a lifetime group licence",
      quantity: 3,
      price: 30000,
      amount: 90000,
    },
    {
      item: "Kaspersky",
      description: "1 year antivirus protection group licence",
      quantity: 3,
      price: 3000,
      amount: 9000,
    },
  ];
  return (
    <View style={Object.assign({}, styles.section, styles.tableRow)}>
      <View style={Object.assign({}, styles.row, styles.tableRow, styles.bold)}>
        <Text style={Object.assign({}, styles.quarterWidth, styles.tableCell)}>
          Item
        </Text>
        <Text style={Object.assign({}, styles.halfWidth, styles.tableCell)}>
          Description
        </Text>
        <Text style={Object.assign({}, styles.width7, styles.tableCell)}>
          Qty
        </Text>
        <Text
          style={Object.assign(
            {},
            styles.width9,
            styles.tableCell,
            styles.alignRight
          )}
        >
          Price
        </Text>
        <Text
          style={Object.assign(
            {},
            styles.width9,
            styles.tableCell,
            styles.alignRight
          )}
        >
          Amount
        </Text>
      </View>
      {lineItems.map((item) => (
        <View style={Object.assign({}, styles.row, styles.tableRow)}>
          <Text
            style={Object.assign({}, styles.quarterWidth, styles.tableCell)}
          >
            {item.item}
          </Text>
          <Text style={Object.assign({}, styles.halfWidth, styles.tableCell)}>
            {item.description}
          </Text>
          <Text style={Object.assign({}, styles.width7, styles.tableCell)}>
            {item.quantity}
          </Text>
          <Text
            style={Object.assign(
              {},
              styles.width9,
              styles.tableCell,
              styles.alignRight
            )}
          >
            {item.price}
          </Text>
          <Text
            style={Object.assign(
              {},
              styles.width9,
              styles.tableCell,
              styles.alignRight
            )}
          >
            {item.amount}
          </Text>
        </View>
      ))}

      <View
        style={Object.assign({}, styles.row, styles.bold, styles.justifyEnd)}
      >
        <Text
          style={Object.assign(
            {},
            styles.width16,
            styles.tableCell,
            styles.alignRight
          )}
        >
          Total (Ksh)
        </Text>
        <Text
          style={Object.assign(
            {},
            styles.width9,
            styles.tableCell,
            styles.alignRight
          )}
        >
          117000
        </Text>
      </View>
      <View
        style={Object.assign({}, styles.row, styles.bold, styles.justifyEnd)}
      >
        <Text
          style={Object.assign(
            {},
            styles.width16,
            styles.tableCell,
            styles.alignRight
          )}
        >
          Paid (Ksh)
        </Text>
        <Text
          style={Object.assign(
            {},
            styles.width9,
            styles.tableCell,
            styles.alignRight
          )}
        >
          0
        </Text>
      </View>
      <View
        style={Object.assign({}, styles.row, styles.bold, styles.justifyEnd)}
      >
        <Text
          style={Object.assign(
            {},
            styles.width16,
            styles.tableCell,
            styles.alignRight
          )}
        >
          Due
        </Text>
        <Text
          style={Object.assign(
            {},
            styles.width9,
            styles.tableCell,
            styles.alignRight
          )}
        >
          117000
        </Text>
      </View>
    </View>
  );
}

function Notes() {
  return (
    <View style={styles.section}>
      <Text style={Object.assign({}, styles.bold, styles.paragraph)}>
        Notes
      </Text>
      <Text style={styles.paragraph}>All prices are in kenya shillings</Text>
      <Text style={styles.paragraph}>Payments are non refundable</Text>
    </View>
  );
}
And finally, change the styles to
const styles = StyleSheet.create({
  section: {
    marginTop: "4vh",
  },
  row: {
    display: "flex",
    flexDirection: "row",
  },
  equalSize: {
    flex: "1 1 0%",
  },
  halfWidth: {
    width: "50%",
  },
  quarterWidth: {
    width: "25%",
  },
  width7: {
    width: "7%",
  },
  width9: {
    width: "9%",
  },
  width16: {
    width: "16%",
  },
  tableCell: {
    padding: "4",
  },
  pushRight: {
    marginLeft: "auto",
  },
  dt: {
    fontSize: "8pt",
    marginBottom: "4pt",
  },
  sectionHeading: {
    backgroundColor: "#eee",
    justifyContent: "center",
    paddingVertical: "4",
  },
  tableRow: {
    borderBottom: "1px solid #ccc",
  },
  bold: {
    fontFamily: "Helvetica-Bold",
  },
  justifyEnd: {
    justifyContent: "flex-end",
  },
  paragraph: {
    marginBottom: 10,
  },
  alignRight: {
    textAlign: "right",
  },
});
In the next post, we will dynamically generate a PDF proforma invoice on the server by replacing all the static data with props.